“How to Direct to Film Print: A Journey from Digital to Celluloid” -MAXDTF- UV DTF Printing Paper Supplier, China UV DTF Transfer AB Decal, Made in China
Direct to Film (DTF) printing has redefined the landscape of custom decoration, bridging the gap between digital creativity and tangible, high-quality prints on nearly any substrate. Unlike traditional methods that rely on screens or pre-cut materials, DTF printing streamlines the process by transferring designs directly from digital files to a specialized film, which is then applied to fabrics, metals, plastics, and more. This journey—from a pixelated concept to a durable, vibrant print—combines technical precision with creative freedom, making it accessible to both hobbyists and industrial printers. In this guide, we break down each step of the DTF printing process, highlighting key techniques, essential tools, and pro tips to ensure your prints transition seamlessly from digital to celluloid (film) and beyond.
1. Understanding the Basics: What Is DTF Printing?
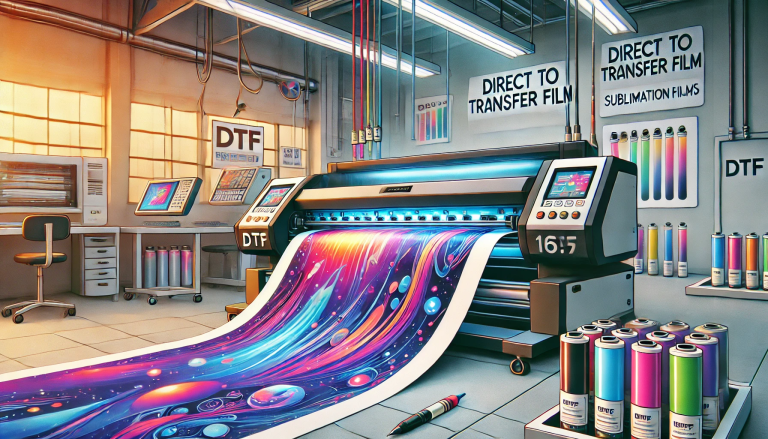
Before embarking on the printing journey, it’s critical to grasp the core of DTF technology. DTF printing involves two primary phases: printing the design onto a DTF film using heat-curable inks, and transferring the film-based design onto the target substrate via heat and pressure. Unlike Direct to Garment (DTG) printing, which applies ink directly to fabric, DTF uses the film as a temporary carrier—allowing it to work with non-textile materials like wood, glass, and metal. The key advantage lies in its versatility: a single DTF setup can produce prints for t-shirts, phone cases, signage, and promotional items, all with minimal adjustments.
At the heart of the process is the DTF film itself—a heat-activated, multi-layer material consisting of a carrier sheet, release layer, and ink-receptive surface. This structure ensures the design adheres to the film during printing and releases cleanly onto the substrate during transfer, resulting in sharp, long-lasting results.
2. Pre-Printing Preparation: Gather Tools and Optimize Designs
The foundation of successful DTF printing lies in thorough preparation. This phase combines selecting the right equipment, refining your digital design, and ensuring materials are ready for production. Skipping these steps can lead to smudged prints, poor adhesion, or wasted resources.
2.1 Essential Tools and Materials
Invest in quality equipment to avoid common pitfalls. Here’s your must-have checklist:
- DTF Printer: Choose a printer designed for DTF applications, equipped with piezoelectric printheads (for precise ink deposition) and compatible with water-based, heat-curable DTF inks. Desktop models work for small batches, while industrial printers handle high-volume production.
- DTF Inks: Opt for CMYK (cyan, magenta, yellow, key/black) inks, plus white ink for printing on dark substrates. High-quality inks ensure vibrant colors and resistance to fading/washing.
- DTF Film: Select film based on your substrate—textile-grade film for fabrics, hard-surface film for non-porous materials. Choose between hot-peel (for fast production) and cold-peel (for delicate substrates) variants.
- Hot-Melt Adhesive Powder: A critical component that bonds the design to the substrate. Use low-tack powder for fabrics and high-tack powder for hard surfaces.
- Curing Equipment: A heat press (for small jobs) or conveyor dryer (for large batches) to set the ink and melt the adhesive. Ensure it reaches temperatures between 150–180°C (302–356°F).
- Design Software: Adobe Photoshop, Illustrator, or free tools like GIMP/Canva for creating and optimizing designs.
- Supplementary Tools: A squeegee (for even pressure during transfer), lint roller (for cleaning substrates), and adhesive shaker (for uniform powder application).
2.2 Optimize Your Digital Design
A well-optimized design translates to a flawless print. Follow these guidelines:
- Resolution: Set your design to 300 DPI (dots per inch) to ensure sharp details. Low-resolution files result in blurry or pixelated prints.
- Color Mode: Use CMYK (not RGB) to match the printer’s ink system. RGB colors (used for screens) may appear distorted when printed.
- White Ink Layer: For dark substrates, add a white ink underlayer in your design. This acts as a base, making colors pop and preventing bleeding.
- Size and Placement: Adjust the design size to fit your substrate, leaving a 1–2mm margin for trimming. Mirror the design only if printing on transparent materials (e.g., glass) for front-facing visibility.
3. The Printing Process: From Digital File to DTF Film
This phase is where your digital design comes to life on celluloid. Follow these steps for precise, consistent results:
3.1 Load the DTF Film
Proper film loading prevents jams and ensures even printing:
- Turn on the printer and allow it to warm up (follow the manufacturer’s instructions—typically 5–10 minutes).
- Cut the DTF film to a size slightly larger than your design (avoids printer errors from empty space).
- Load the film into the printer’s media tray with the ink-receptive side up (check the film’s packaging for guidance—usually the smoother side).
- Adjust the tray guides to fit the film’s width—snug but not tight, to prevent warping.
3.2 Print the Design
Send your optimized design to the printer and configure the settings:
- In the printer software, select “DTF Film” as the media type—this tells the printer to use the correct ink density and print speed.
- For dark substrates, enable the white ink layer and set it to print first (under the color inks).
- Start the print job. The printer will deposit ink in layers: white (if needed), then CMYK. The printhead moves smoothly over the film, ensuring even ink coverage.
- Once printing is complete, remove the film carefully—avoid touching the ink surface, as it may be slightly tacky.
3.3 Apply Adhesive Powder
The adhesive powder is what binds the design to the substrate—application must be uniform:
- Lay the printed film (ink side up) on a flat surface.
- Sprinkle the hot-melt adhesive powder evenly over the entire printed area using a shaker. Ensure no gaps or clumps—excess powder can be reused.
- Gently tap the film to remove loose powder, then use a soft brush to sweep away any remaining excess.
3.4 Cure the Film
Curing melts the adhesive and sets the ink, ensuring durability:
- Preheat your curing equipment to 160°C (320°F) for fabrics or 180°C (356°F) for hard surfaces.
- Place the film (ink and powder side up) in the dryer or under the heat press. Cure for 60–90 seconds—longer for thick films or large designs.
- Remove the film and let it cool for 1–2 minutes. The adhesive should be dry to the touch and firmly bonded to the ink.
4. Transfer Phase: From Film to Substrate
This is the final step in the journey—transferring the cured design from the DTF film to your target material. The process varies slightly by substrate, but the core principles remain the same.
4.1 Prepare the Substrate
A clean, smooth surface ensures strong adhesion:
- Fabrics: Wash and dry the fabric to remove oils or residues. Iron it to eliminate wrinkles—wrinkles cause uneven transfers.
- Hard Surfaces (Metal/Glass/Plastic): Wipe with a lint-free cloth dampened with isopropyl alcohol to remove dust and fingerprints. Ensure the surface is completely dry.
4.2 Apply Heat and Pressure
Heat activates the adhesive, while pressure ensures the design bonds evenly:
- Position the cured film (ink and adhesive side down) onto the substrate. Align it carefully—once pressed, it cannot be repositioned.
- For fabrics: Use a heat press set to 160°C (320°F) and apply medium pressure (8–10 psi) for 15–20 seconds. For hard surfaces: Increase pressure to 12 psi and extend the time to 30 seconds.
- For hot-peel film: Immediately peel the carrier sheet away at a 45-degree angle while the film is still hot. For cold-peel film: Let the film cool completely (2–3 minutes) before peeling.
4.3 Post-Transfer Inspection
Check the print for issues and make adjustments if needed:
- Air Bubbles: Puncture small bubbles with a pin and press the area flat with a squeegee.
- Peeling Edges: Reapply the heat press to the affected area for 5–10 seconds to reinforce adhesion.
- Smudges: Ensure the ink was fully cured—smudges indicate insufficient curing time or temperature.
5. Pro Tips for Perfect DTF Prints
Elevate your DTF printing game with these expert insights:
- Test First: Always print a sample on scrap film and transfer it to a test substrate before starting a large job. This helps adjust settings for color accuracy and adhesion.
- Store Materials Properly: Keep DTF film and inks in a cool, dry place away from direct sunlight. Heat and humidity can cause film warping or ink separation.
- Maintain Your Printer: Clean the printheads weekly to prevent clogs. Use the printer’s built-in cleaning function or a specialized cleaning solution.
- Match Adhesive to Substrate: Use flexible adhesive for stretchy fabrics (e.g., spandex) and rigid adhesive for hard surfaces (e.g., metal). Mismatched adhesives lead to peeling.
- Control Environment: Print in a room with 40–60% humidity and temperatures between 20–25°C (68–77°F). Extreme conditions affect ink drying and film handling.
6. Troubleshooting Common DTF Printing Issues
Even with preparation, issues may arise. Here’s how to fix the most common problems:
6.1 Faded or Dull Colors
Causes: Low ink density, incorrect color mode, or no white underlayer on dark substrates.
Solutions: Increase ink density in the printer settings, use CMYK color mode, and add a white underlayer for dark materials.
6.2 Adhesive Not Bonding
Causes: Insufficient heat/pressure, expired adhesive powder, or dirty substrate.
Solutions: Adjust the heat press settings, replace old adhesive, and thoroughly clean the substrate.
6.3 Film Jamming in the Printer
Causes: Incorrect film loading, warped film, or dirty media guides.
Solutions: Reload the film with the correct side up, use fresh film, and clean the printer’s media guides.
7. Conclusion
The journey from a digital design to a tangible DTF print is a blend of technical precision and creative expression. By following the steps outlined in this guide—preparing your tools and designs, printing and curing the film, and transferring the design to the substrate—you can achieve professional-quality results that rival industrial prints. DTF printing’s versatility, cost-effectiveness, and ease of use make it a powerful tool for anyone looking to bring their ideas to life, whether you’re creating custom t-shirts, branded merchandise, or unique home decor. With practice and attention to detail, you’ll master the art of DTF printing, turning digital concepts into durable, vibrant prints that stand the test of time.