“The Ultimate Solution for Easy, Secure Transfers – DTF Transfer Tape Sheets!” -MAXDTF- DTF Transfer sticker Factory, DTF Film paper Supplier, Made in china
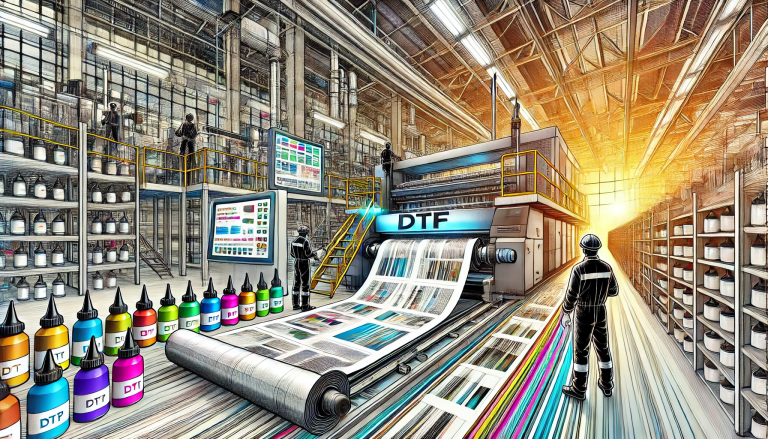
In the realm of Direct to Film (DTF) printing, much of the attention focuses on printers, inks, and hot-melt powders—yet one component plays a pivotal role in turning printed designs into flawless final products: DTF transfer tape sheets. These specialized adhesive sheets act as the bridge between cured DTF film and the target substrate, ensuring that intricate designs, small details, and multi-part graphics are transferred accurately and seamlessly. Whether for hobbyists creating custom apparel at home or large factories fulfilling bulk orders, DTF transfer tape sheets eliminate the frustration of misalignment, tearing, or incomplete transfers. This article sheds light on this essential DTF accessory, exploring its purpose, types, usage, benefits, and why it has become indispensable in modern customization workflows.
What Are DTF Transfer Tape Sheets? Defining the Basics
DTF transfer tape sheets are thin, flexible sheets coated with a temporary, repositionable adhesive on one side and a release liner on the other. Their primary function is to lift cured designs from DTF film and securely position them onto substrates (such as fabric, wood, or plastic) before heat pressing. Unlike permanent adhesives, the glue on DTF transfer tape is designed to hold the design in place during alignment but release cleanly once the transfer is complete—leaving no residue on the final product.
These sheets are typically available in standard sizes (A4, A3) or rolls, with variations in adhesive strength, thickness, and transparency. The choice of tape depends on the complexity of the design (e.g., fine text vs. large graphics) and the type of DTF film used, ensuring compatibility across different DTF printing setups.
Types of DTF Transfer Tape Sheets: Matching to Your Needs
Not all DTF transfer tape sheets are created equal. Manufacturers offer specialized options to cater to diverse printing scenarios, each with unique properties that optimize performance. The three most common types are:
1. Low-Tack Transfer Tape
Ideal for delicate designs with fine lines, small text, or intricate patterns, low-tack tape features a mild adhesive that lifts the design without stretching or distorting it. It is particularly useful for thin DTF films or designs printed with minimal hot-melt powder, as it reduces the risk of tearing during the lifting process. Low-tack tape is also repositionable, allowing users to adjust the design’s placement on the substrate before heat pressing—perfect for hobbyists or those new to DTF printing.
2. High-Tack Transfer Tape
Designed for large, bold graphics or designs with thick layers of hot-melt powder, high-tack tape offers a strong adhesive bond that ensures the entire design lifts uniformly from the DTF film. It is resistant to slipping during alignment, making it suitable for bulk production where consistency is key. High-tack tape is also durable enough to handle heavy substrates like denim or leather, providing a secure grip that prevents misalignment during heat pressing.
3. Clear vs. Opaque Transfer Tape
Beyond adhesive strength, DTF transfer tape sheets come in clear or opaque variants. Clear tape allows users to see through to the substrate, enabling precise alignment with existing graphics, seams, or edges—essential for customizing items like t-shirts with necklines or bags with pockets. Opaque tape, often white or gray, provides better contrast against dark DTF films, making it easier to visualize the design’s boundaries during the lifting process. Both options work with all DTF inks and substrates, with the choice depending on user preference and project requirements.
How to Use DTF Transfer Tape Sheets: A Step-by-Step Guide
Integrating DTF transfer tape sheets into your DTF workflow is simple, but following best practices ensures optimal results. Below is a step-by-step breakdown of the process:
1. Prepare the Cured DTF Film
After printing and curing your design on DTF film (ink dried, hot-melt powder fused), ensure the film is cool to the touch (room temperature is ideal). This prevents the adhesive on the transfer tape from melting prematurely, which could cause the design to stick to the tape permanently.
2. Cut the Tape to Size
Using scissors or a cutting machine (e.g., Cricut), cut a piece of DTF transfer tape slightly larger than the printed design. This extra margin provides a “handle” for lifting and aligning the tape, reducing the risk of touching the adhesive or design.
3. Apply the Tape to the DTF Film
Peel the release liner from the transfer tape to expose the adhesive side. Carefully place the tape over the cured design, starting from one edge and smoothing it down with a squeegee or credit card. Apply firm, even pressure to ensure the tape bonds with the entire design—pay special attention to edges and fine details to avoid air bubbles or gaps.
4. Lift the Design from the DTF Film
Gently peel the transfer tape upward at a 45-degree angle. The design should lift cleanly from the DTF film, adhering to the tape. If any part of the design remains on the film, lay the tape back down, apply more pressure with the squeegee, and retry. For large designs, enlist a helper to lift the tape evenly, preventing stretching.
5. Align and Position on the Substrate
Place the transfer tape (with the design facing down) on the target substrate. Use the tape’s transparency (if clear) or contrast (if opaque) to align the design precisely. Once positioned, press the tape firmly onto the substrate to secure it—this prevents shifting during heat pressing.
6. Heat Press and Remove the Tape
Set your heat press to the recommended temperature and time for your substrate (typically 150°C–180°C for 10–30 seconds). After pressing, allow the substrate to cool for 5–10 seconds (or as directed by your DTF film manufacturer). Peel the transfer tape away at a 45-degree angle—slowly for delicate designs—to reveal the perfectly transferred design.
Why DTF Transfer Tape Sheets Are Non-Negotiable: Key Benefits
While some DTF users attempt to transfer designs without tape (relying on direct film placement), the benefits of using DTF transfer tape sheets far outweigh the minimal extra effort. Here’s why they are essential:
1. Precision Alignment for Professional Results
The biggest advantage of transfer tape is its ability to ensure precise design placement. Without tape, aligning small or asymmetrical designs (e.g., logos, monograms) on curved or irregular substrates (e.g., hats, sleeves) is nearly impossible, leading to lopsided or off-center results. Transfer tape holds the design in place, allowing users to adjust before pressing—critical for creating professional-looking products.
2. Prevents Design Damage and Waste
Cured DTF designs are durable but can tear or separate if handled directly. Transfer tape lifts the entire design as a single unit, eliminating the risk of stretching fine lines or losing small elements (e.g., dots, serifs). This reduces material waste, as fewer designs are ruined during transfer—saving time and money for businesses and hobbyists alike.
3. Streamlines Bulk Production
For factories or businesses fulfilling large orders, transfer tape speeds up the workflow. It allows users to pre-lift multiple designs onto tape, then quickly align and press them onto substrates—reducing the time spent on individual transfers. High-tack tape, in particular, ensures consistent results across hundreds of items, maintaining quality control in high-volume settings.
4. Versatility Across Substrates and Designs
DTF transfer tape sheets work with all DTF-compatible substrates, from soft cotton to rigid wood. They also accommodate every design type, from simple text to full-color photorealistic images. By choosing the right tape (low-tack for delicate designs, high-tack for bold ones), users can tackle any project with confidence.
Choosing the Right DTF Transfer Tape Sheets: Key Considerations
To get the most out of DTF transfer tape sheets, consider the following factors when making a purchase:
1. Match Adhesive Strength to Design Complexity
Use low-tack tape for designs with fine details, small text, or thin powder layers. Opt for high-tack tape for large graphics, thick powder applications, or heavy substrates. Testing a small piece of tape with your design before bulk use ensures compatibility.
2. Consider Substrate and Film Type
For stretchy substrates like spandex, choose a flexible transfer tape that moves with the fabric. For rigid substrates like metal, a sturdier tape will provide better grip during alignment. Additionally, ensure the tape is compatible with your DTF film—most tapes work with standard films, but specialized films (e.g., low-temperature) may require matching tape.
3. Prioritize Quality Over Cost
Cheaper transfer tapes may have inconsistent adhesive strength or leave residue on substrates. Invest in high-quality tape from reputable manufacturers—look for products labeled “DTF-specific” to ensure they are formulated for the unique properties of DTF inks and powders.
Conclusion: Elevating DTF Printing with the Right Tape
DTF transfer tape sheets may be a small component in the DTF printing workflow, but their impact on the final product is enormous. They turn the often-frustrating transfer process into a seamless, precise task, ensuring that every design—whether for a custom t-shirt, promotional item, or home decor piece—looks professional and polished. From hobbyists to large factories, anyone using DTF technology can benefit from incorporating transfer tape into their process, reducing waste, saving time, and elevating the quality of their work.
As DTF printing continues to grow in popularity, the demand for high-quality transfer tape sheets will only increase. By understanding the different types, mastering their use, and choosing the right tape for each project, DTF users can unlock the full potential of this innovative printing technology—one perfectly transferred design at a time.